The Secret Language of Comics

Avatar

This avatar represents a large aspect of what I consider to be part of my identity. Since young, I have always held an interest in cooking: during summers I would enroll in cooking classes at the local community college, I would volunteer for bake sales at the local church, and I would burn through several hours under the tutelage of my maternal grandmother. Although different cultural foods interest me, what truly captivates me is the savory Mexican cuisine I grew up with and continue to expand on.

Throughout the process of creating my avatar, I had trouble with the measurements and navigating my way through pixlr. After spending some time on the site, however, it became much easier to understand. The image was cropped into a perfect square, the lines looked smoother, and the shading more saturated. I feel that with enough practice in this site, the task of uploading images into WordPress will be done in a more timely manner.

Avatar

My avatar’s motivation came from my most beloved British Shorthair cat. He’s a British shorthair, so I decided to use gray and black color. Additionally, I believe in the “less is more” principle in Chinese traditional painting when it comes to drawing, so I want my avatar to consist of simple textures and figures. That being said, I utilized “monoline” and “floral pencil” brush to approximate the impressionist and simplistic stroke while preserving the character’s countenance and character. The big ears were the only part I combined two strokes because I intended to emphasize it as the cat’s defining characteristic.

My greatest difficulty was that I don’t know how to even start, because this is literally my first try in almost 8 years. For some technical reason I couldn’t use procreate for free so I tried three different applications. However, I guess I could build on this style further in this class.

Avatar

I decided to keep my avatar simple because that is how I would describe myself. I used darkish toned colors in majority of the image, so I decided to keep the background white. I created the image of myself by using an app called Sketchbook, in which I outlined a picture I chose of myself. I chose to place my name vertically and in a way that it, hopefully, looks like its hiding behind the drawing of myself. I drew a turtle reading a book because I find animals amusing in how many there are and that they are different from one another. I made it read a book to incorporate the class, which is based on reading and analyzing comics. Overall, this task was a lot of work because drawing is not something I do often. I think that drawing on an eletronic device made it a lot more difficult since it was my first time. I did enjoy drawing and hope to improve during this class.

Sketch 1: Avatar

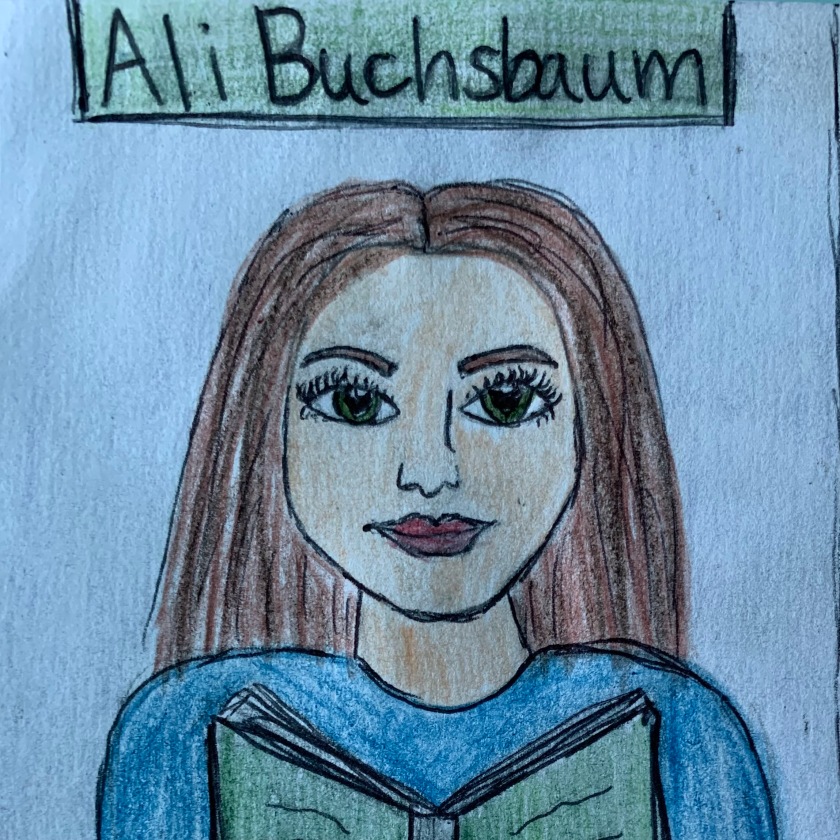
For this assignment I wanted to create an image that represented me as well as what would be happening in this class. I decided to draw myself reading a book and I wrote my name at the top of the image. Although it might be mundane, this took me a long time to draw because I am not the best artist. I had a hard time trying to make the proportions of the face accurate and I struggled the most while trying to create the eyes. I still think that they are not very even, but nothing is ever perfect. I did not use any outside sources for this drawing. I decided to sketch something that was similar to how I have seen a person drawn in the past and add features that mirror my own. I added the same color hair and eyes and I even tried to replicate my eyebrow shape. Even though this image is just myself and a book, I wanted to create something that was simple to demonstrate that I have yet to experience this class and been able to grow. I think it would be interesting to redo this drawing at the end of the semester and decorate the space around me with things I have learned. I could even change the book that I am reading to my favorite book that we will have read in this class. Even though I found this drawing to be difficult in some ways, I enjoyed the activity and I think it allowed me to use a different part of my brain than what is expected for typical college assignments.

Avatar

I created this image for my avatar because it represents me in a variety of ways. Overall, my main objective with this piece was to try to establish a sense of happiness every time I see it. The pink in the background showcases my favorite color, evoking calm and bright feelings like the sunset or a strawberry milkshake. The letters and my pixelated face evokes a sense of pleasing nostalgia for me: my face reminding me of retro video games and the lettering reminds me of music posters in the 1970s. Additionally, the style of the letters and colors is indicative of what I find appealing in art, such as vibrant colors and an active jazzy nature, reminiscent of works such as Stuart Davis and Keith Haring. Lastly, I chose the large letters and colors for a practical reason so even in a small icon on my website, it would be vibrant enough to be legible at a small size.

Sketch 1: Avatar

Due: 1/16

Tag: sk1

Objectives:

  • Very basic photo editing
  • Introduction to the concept of Creative Commons
  • Uploading and publishing to your new WordPress site
  • Visual images as representations of complex conceptual topics

Avatar

Once you’ve created your web site, you need an image to represent yourself and/or your site for the class: an avatar. Your avatar can be whatever you want it be but try to create something that both reflects your personality and speaks to the topic for this class in some way.

Start by choosing one or more of your own photos as the basis of the avatar, drawing something yourself and scanning it, or finding one or more Creative Commons-licensed images on Flickr that you can modify. (Make certain to keep a note for yourself of the URL for the photos you use if they are not your own.)

CC-licensed images

Creative Commons licenses work with copyright law so that creators can share their work in a way that allows others to use it with attribution. The video on the left gives a good overview of the concept of Creative Commons licensing. The one on the right gives more explanation of how they work. They are short and worth watching.

You can find CC-licensed images by choosing licensed images on Flickr or with an advanced Google image search.

Edit Photo

Crop and otherwise edit the photo(s) in a photo editing application (like Photoshop or Pixlr). You can create a layered or collage effect, if you’d like. Add your name on your badge in such a way that it’s legible — it can be your full name, just your first name, or the nickname you want to be called this semester.

Your final badge should be square and at least 512 pixels wide and high. Please make certain your badge is square so that it will fit into the design on the student sites page.

Publish

When you’re done, you’ll need to put the image two places, with an optional third:

First

Load the badge into your Media Library and publish it to your site in a blog post. (If adding it as a feature image means that the entire square image won’t display, then also insert the image into the post itself.)

Include information and links in the post about the source(s) for images included in your badge.

Write a paragraph or two about why you chose those images, what aspects of yourself and your interests are represented in your badge, and/or what difficulties you faced in creating the badge.

Please tag your post with the tag “sk1,” plus any additional tags that you think are appropriate.

Second

Go into your dashboard to Design > Customize > Site Identity. Load the image as your site icon (not as the logo).

Finally

If you do not already have a gravatar, create a gravatar account and load your avatar there. From then on, your avatar will show up as your picture when you leave comments here and on other students’ sites.

css.php